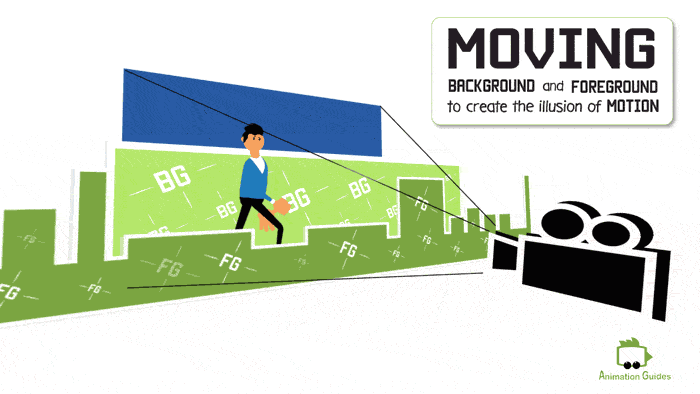
To achieve a believable character movement nosotros should either make the character walk beyond the surroundings or brand the environment motion behind the graphic symbol while he/she walks in place.
This tutorial is most how to create an surroundings that will curl while your puppet walks in place. Plain, at that place is a surprising, withal simple way to reach this in Adobe Character Animator *.
Nosotros volition bring the graphic files for the foreground and background separately into Adobe Character Animator. Then we will add a walking behavior to information technology and subsequently some tweaking, nosotros will be able to move everything together using the pointer keys in the Adobe Character Animator scene.
Follow these seven simple steps and yous will have a moving background and foreground for your character to walk in.
The showtime step would be preparing the artwork for the environment.
We will need to create the graphics for the Foreground and the Background and save them as separate files. The artworks can be saved equally .ai, .psd or even just a simple .png.
Brand sure you don't use .jpg for the foreground layer since this format does not support transparency.
Since the background image volition exist the one moving instead of the character it should be significantly wider than the scene. It should exist at least 2 times wider than the scene width. The wider the image the more walking infinite in that location is.
Adding a foreground layer to your scene volition help create the illusion of depth. The foreground artwork yous create should be the aforementioned width as the background layer.
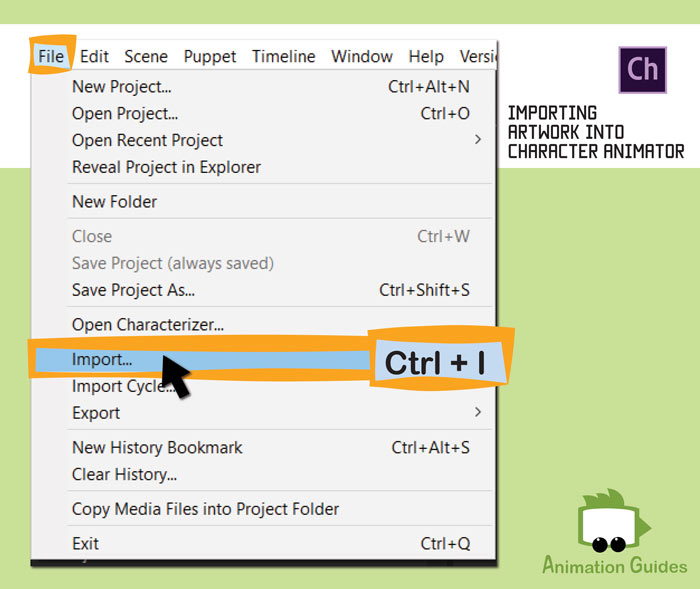
- Import both Foreground and Background source files to Adobe Character Animator.
- Import a boob with a walking behavior practical into the aforementioned projection.
- Become to the rig view.
- Select the Foreground (FG) and Groundwork (BG) Elements in the project panel.
- Click the + sign next to the Behaviors in the properties panel and add the Walk beliefs.
- Change the Mode to "Left and Correct Arrow Keys".
- Set the Strength to 0% so the background and foreground will non move up and down during the "walk".
- Change the Body Speed to a Negative Value. (This value will require some tweaking to fit your scene size and puppet walk settings).
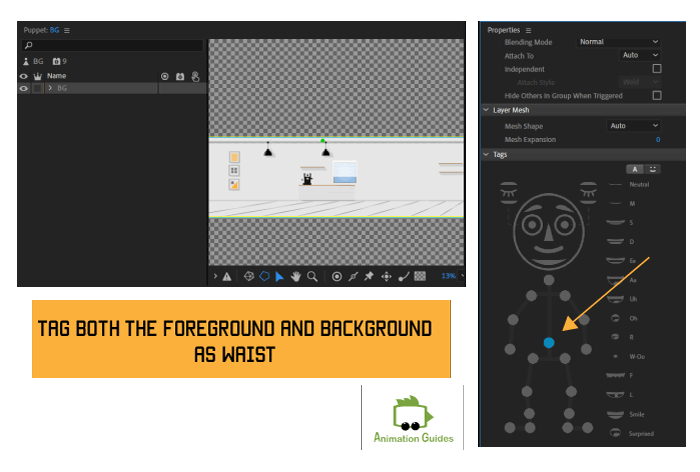
5. Tag the Groundwork and the Foreground as Waist.
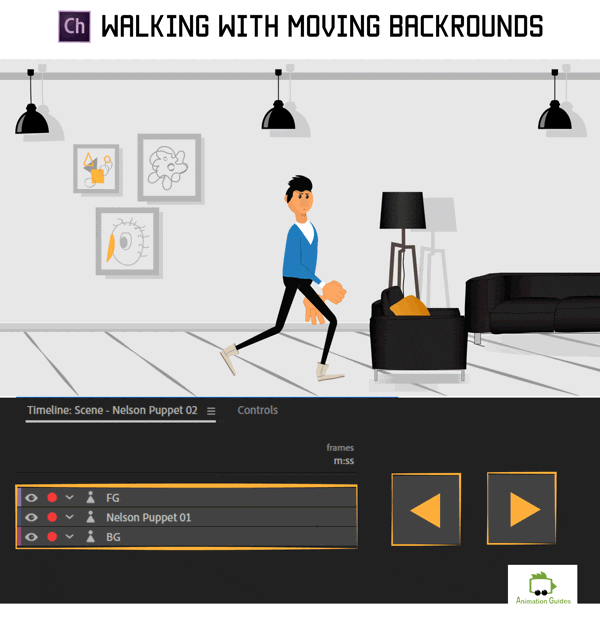
Stride 5: Create a New Scene
- Create a New Scene with the required dimensions.
- Place your boob in the scene.
- Elevate both the FG and BG into your scene.
- Identify the FG above the puppet and the BG below the puppet.
Now yous can test your walking scene.
- Select and Arm your puppet, groundwork, and foreground together.
- Press the pointer keys to test the walk.
- You might need to adjust the speed of your background and foreground to make the walk feel fluid.
An event you might encounter when using a scrolling environment in Character Animator is that it will movement as long as y'all press the arrow keys, even if information technology does not cover the entire scene.
A simple "lightweight" solution to information technology would be adding a static base background below the moving background and then it won't be so obvious if you accidentally walk farther than yous intended.
Yous at present accept a working parallax walking system. You can go out it every bit is or make information technology more than interesting by adding some interactivity to the environment.
Depending on your scene, there are ways to make it more interesting past calculation triggerable animations and physics.
In the case scene, we take a door that can exist opened and closed. Window bleeds that go up and down, an animated motion picture, and even some dangle handle on a few of the lamps just for fun.
You now have a complete scene to movement effectually in. Add a camera * to your scene and start recording.
Stay tuned for new tutorials!
Source: https://www.animationguides.com/moving-backgrounds-adobe-character-animator/
Posted by: barrientosproself.blogspot.com


0 Response to "How To Add Background To Adobe Animate"
Post a Comment